

Setting Up a Raised Garden Bed – Step by Step to Your Own Mini Garden
A raised bed can be many things: a slice of self-sufficiency in a limited space, an invitation to bees and butterflies, and an ideal spot for aromatic herbs, colorful flowers, or crunchy radishes. The great news is that despite all this variety, you don’t need to be a professional gardener to create a thriving raised bed. With solid planning, proper filling, and a basic understanding of botany, setting up your raised bed is remarkably easy.
What Are the Advantages of a Raised Garden Bed?
A raised bed creates optimal conditions for healthy plant growth: the soil warms up faster, the substrate stays loose and nutrient-rich, snails are easier to keep at bay, and gardening is possible without back pain. Especially for urban balconies or small gardens, a raised bed offers a space-saving and sustainable solution.
When it comes to planting, you have complete freedom—anything from vegetables to a sea of flowers is possible. A mix of both is often easily achievable as well.
Location and Choice of Materials
Before getting started, careful planning pays off. Where should the raised bed stand? What do you want to plant? A sunny to semi-shaded spot protected from strong winds is ideal. A southern or southwestern exposure almost always works well. Also, ensure structural stability—especially on terraces or balconies that might have weight limits, as the heavy load of a large raised bed can cause issues if calculated incorrectly.
You also have many options when selecting materials. Wood looks particularly natural and is easy to work with. Proper weatherproofing or a waterproof inner lining is essential to ensure longevity. Alternatively, there are metal or plastic models that are low-maintenance and durable. Raised bed kits, available at any hardware store, are especially practical.
The Correct Layering System
Layering inside the raised bed is crucial for healthy plants and long-term yields. A system consisting of several distinct layers has proven most effective:
- Bottom layer: A drainage layer made of coarse wood cuttings, twigs, or shredded branches. This ensures aeration and prevents waterlogging.
- Second layer: A layer of leaves, grass clippings, or coarse compost—this generates decomposing heat and loosens the soil.
- Third layer: Semi-decomposed compost or nutrient-rich garden soil.
- Top layer: High-quality potting soil, ideally mixed with a bit of sand or coconut coir.
This structure supplies your plants with everything they need for weeks and months without requiring constant fertilizing.
Planting Flowers in a Raised Bed – How to Do It
A raised bed is fantastic for flowers. Annual varieties that attract many insects thrive particularly well here. It is best to choose an insect-friendly mixture, turning your bed not only colorful but buzzing with life throughout the summer.
Particularly suited for raised beds are:
- Calendula (Marigolds): Robust, undemanding, and a magnet for bees
- Cornflowers: Delicate, color-intensive, and long-blooming
- Field Poppies: A classic that flourishes in raised beds as well
- Viper’s Bugloss, Borage, or Phacelia: Great for biodiversity and soil health
You can choose individual species or mixes with varying bloom times to enjoy color in your bed from spring through late autumn. If you prefer working with seedballs, that is just as easy. They can simply be placed on top of the soil and lightly pressed down. The clay content protects the seeds from drying out and hungry birds.
When Is the Best Time to Sow?
Early bloomers like crocuses or grape hyacinths are planted as bulbs in the autumn—ideally in October or November. To thrive in a raised bed, plant them at least five centimeters deep and cover them with a layer of soil. In early spring, around mid-March depending on weather conditions, sowing of annual flowers begins.
For seedballs: as soon as the danger of frost has passed and the soil has warmed up, they can be set out. Consistent moisture during the first few weeks is key. Keep the bed well-watered during this phase while avoiding standing water. This creates ideal germination conditions.
What Else Fits into a Raised Garden Bed?
Flowers are a wonderful start, but herbs and edible blossoms complement a flowering raised bed perfectly. Nasturtiums, chives, marigolds, or borage can easily be tucked between ornamental plants to enrich your kitchen. Many herbs like thyme, lemon balm, or sage make great companions and require minimal care.
Care and Re-sowing
To keep your raised bed looking vibrant, it needs a little attention. Regularly remove spent blooms to prevent seed formation and encourage continuous flowering. Water preferably in the morning or evening, adjusting the amount according to the weather. During particularly hot summers, a layer of mulch helps retain soil moisture.
Over the months, the soil level will settle slightly as lower layers decompose. Simply top it off with fresh potting soil in autumn or the following spring. If you like, you can start fresh with a new seed mix right away.
Seed Packets, Seed Capsules, or Seedballs?
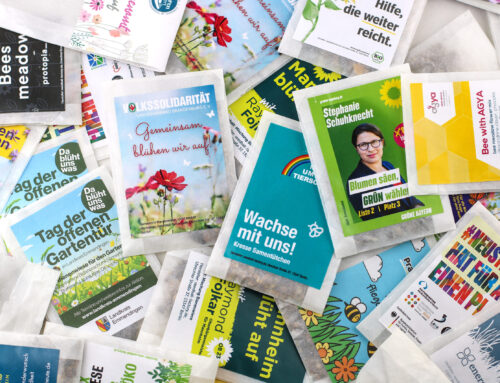
At Seedball Factory, you’ll find various formats to bring your raised garden bed to bloom. Which option works best depends partly on your gardening experience:
- Seed packets offer maximum variety and are ideal for anyone looking to sow specific species deliberately.
- Seed capsules are exceptionally practical because they contain pre-measured seed doses—simply press them into the soil and water.
- Seedballs are the simplest solution for anyone wanting a hassle-free start; no digging or distributing required. Just toss, water, and watch them grow.
All products come from sustainable production, feature plastic-free packaging, and contain only high-quality, tested seeds—often in organic quality. Every single product aligns with Seedball Factory’s mission: promoting blooming diversity, reclaiming habitats, and shrinking ecological footprints. We specialize in making this floral magic giftable—as corporate giveaways or wedding favors.